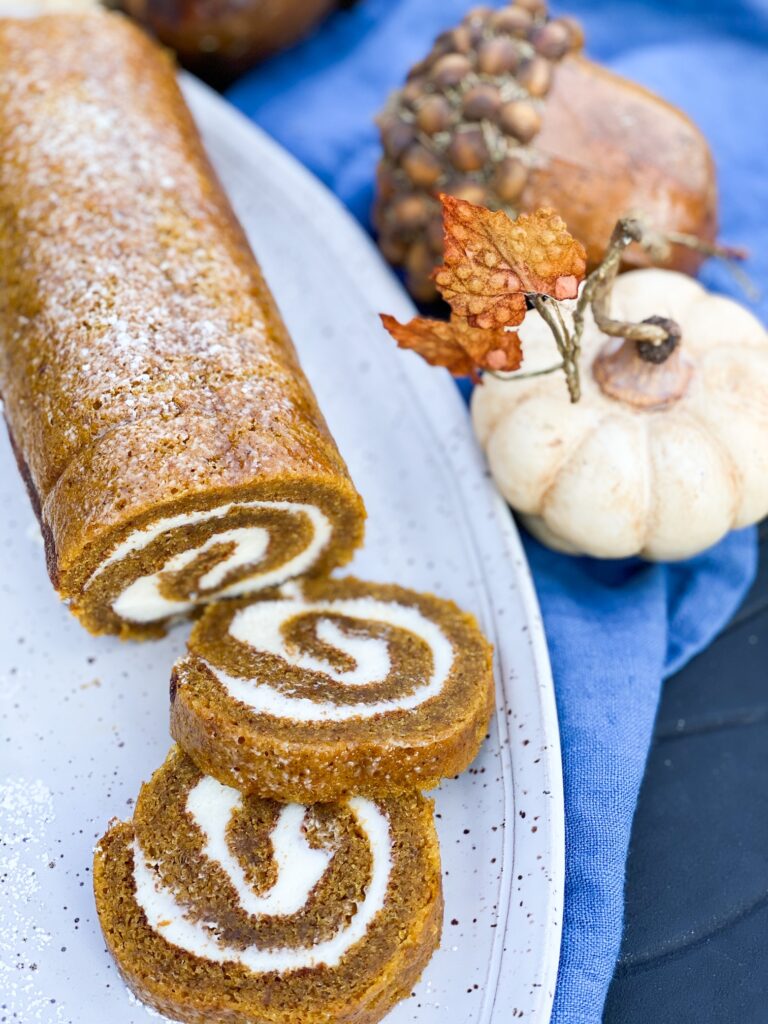
My grandmother made the most amazing pumpkin rolls. I would look forward to this tasty dessert every year at Thanksgiving and Christmas. To be honest other than cheesecake this is my favorite dessert! In true grandmother fashion she would always make me an extra one to keep in the freezer. I miss those days.

Links in this post are sponsored. I earn a small commission from qualifying purchases at no additional cost to you.
I had purchased a few rolls from time to time but the cake would be dry or the icing ratio was off. So I decided to take matters into my own hands.
It was time for me to take over the pumpkin roll baker title and give her recipe a try. I had a few ups and downs in the process but I’ve now made this recipe 3 times and I’ve learned a lot! Below are my tips (and failures) to help you achieve the perfect cake roll! I hope you enjoy my grandmother pumpkin roll as much as I do!
Tips for a Successful Pumpkin Roll
- Always line your jelly roll pan with parchment paper. Then to really make sure it doesn’t stick I spray the paper with this baking spray.
- Use a non-terrycloth towel to roll the cake. You want a towel without lint or big loopy numbs. These towels from William-Sonoma have worked really well for me. My second attempt I used parchment paper to roll up the cake and it was a mess… use a clean towel.
- Cover the towel with plenty of powdered sugar. Don’t skimp on his step.
- When the cake comes out of the oven immediately place on the towel and roll-up. Do not wait. Allowing the cake to cool could result in cracking. And when you’re rolling don’t stop and back up…this too will result in cracking – a BIG crack actually.
- Once rolled in the towel, allow to cool as long as you can. I found the longer I let the cake cool the better it unrolls. If you can wait 30-45 minutes, that’s ideal.

Classic Pumpkin Roll
- Yield: 10 servings 1x
- Category: Dessert
- Method: Baking
- Cuisine: American
Ingredients
CAKE
- 3/4 cup all purpose flour
- 1 cup granulated sugar
- 2/3 cup canned pumpkin (note: not pumpkin pie filling)
- 1/2 teaspoon baking powder
- 1/2 teaspoon baking soda
- 1/2 teaspoon cinnamon
- 1/4 teaspoon ground cloves
- 1/4 teaspoon ground ginger
- 1/4 teaspoon salt
- 3 large eggs
- 1/4 cup powdered sugar – for the towel
FILING
- 1 cup powdered sugar
- 8 ounces cream cheese – at room temperature
- 3 tablespoons butter, at room temperature
- 1 teaspoon vanilla
- Powdered sugar, to garnish
Instructions
- Preheat oven to 375º. Grease 15 x10-inch jelly-roll pan; line with wax or parchment paper. Grease and flour paper. Sprinkle a thin kitchen towel with the ¼ cup of powdered sugar.
- Combine the dry ingredients, flour, baking powder, baking soda, cinnamon, cloves, ginger and salt in a small bowl. In a larger bowl combine eggs and granulated sugar, with an electric mixer, mix until thick and the color of the mixture become a light yellow. Add in the pumpkin and continue to mix. Once combined, stir in flour mixture.
- Spread evenly into prepared pan.
- Bake for 13 to 15 minutes or until an inserted tooth pick comeout clean. Note: try not to over bake as this could cause cracking when rolling up the cake.
- Immediately turn the cake out onto prepared towel with powdered sugar. Carefully peel off the paper. Roll up cake and towel together, starting with narrow end. Allow to cool almost completely.
- Meanwhile combine the cream cheese, 1 cup powdered sugar, butter, and vanilla until smooth.
- Carefully unroll cake. Spread filling over cake. Reroll cake.
- Wrap tightly in plastic wrap and refrigerate at least one hour.
- Sprinkle with powdered sugar before serving, if desired.
Notes
- Pumpkin rolls freeze really well. Wrap in plastic wrap first then wrap again in aluminum foil.
- Your pumpkin roll should last a week in the refrigerator. But keep rolled in plastic wrap while storing or the cake will dry out.
Keywords: Pumpkin Roll, Fall Recipe, Baking


This so good! I won one in a giveaway she did and it was so good I decided to try and make one! It was delicious!
★★★★★
AWWW! YAY! I am so glad you enjoyed it and made on for yourself! Thank you so much for following along on my foodie adventures!